How to Test a Heat-Sealable Bagasse Tray Before Mass Production
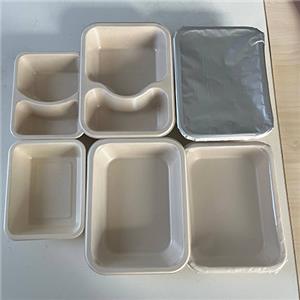
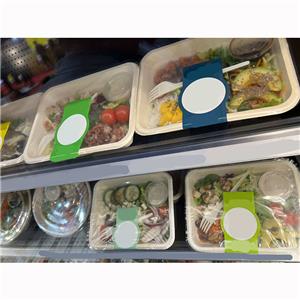
Switching from conventional plastic food trays to molded bagasse packaging can be an important packaging project for a food manufacturer.
But before placing a large production order, one question should always be answered:
Does the bagasse tray actually work with our food product, lidding film, sealing machine, and storage conditions?
A product sample may look good, but appearance alone does not prove that the packaging is ready for commercial production.
For heat-sealable bagasse trays, proper testing should cover the complete packaging system.
This includes the tray, functional film, lidding film, sealing equipment, food product, temperature conditions, and final distribution environment.
This guide explains how food manufacturers, brands, and distributors can test a heat-sealable bagasse tray before moving to mass production.
Why Testing Matters Before Mass Production
A tray can perform well during a small manual test but behave differently on a production line.
Potential problems may appear during:
High-speed sealing
MAP gas flushing
VSP processing
Freezing
Refrigerated storage
Microwave heating
Oven heating
Transportation
Stacking
Long-term storage
A packaging supplier may provide a tray that meets its own material specifications, but the final package still needs to work with the customer's actual food and equipment.
That is why a proper testing process should happen before large-scale production.
What Makes a Bagasse Tray Heat Sealing Ready?
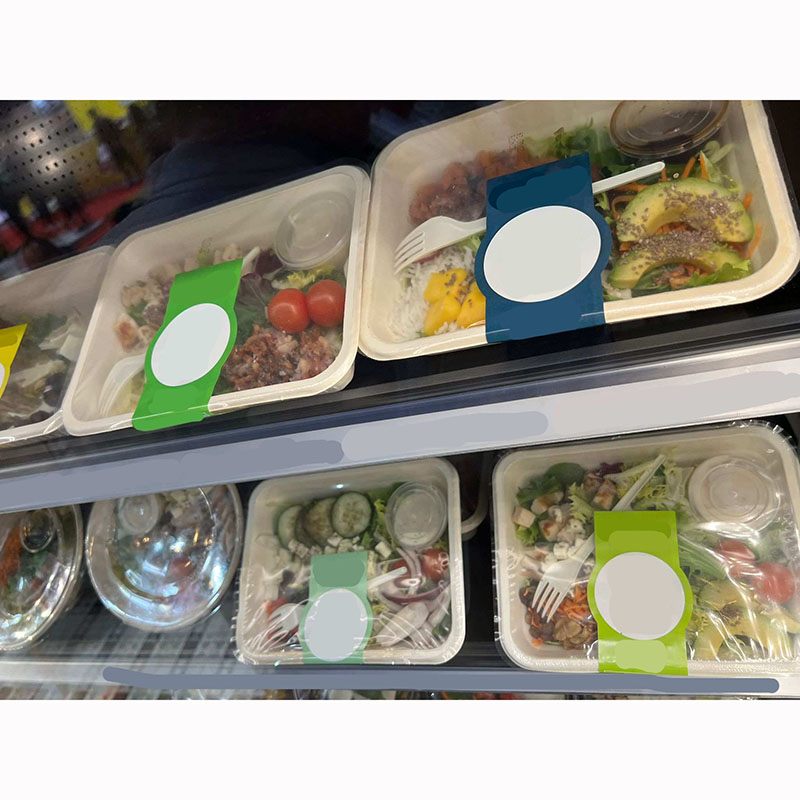
Traditional molded bagasse products are not automatically suitable for heat sealing.
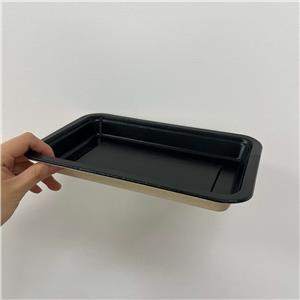
A heat-sealable bagasse tray normally uses a functional film or coating on the sealing surface.
A simplified structure may look like:
Molded bagasse fiber → Functional film → Lidding film
The film layer can provide the sealing interface required to bond the tray with the lidding film.
Depending on the application, possible film structures include:
PP
PET
CPET
PLA
EVOH-enhanced structures
PBAT-based structures
The correct film depends on the application.
For example, a chilled ready meal may have different requirements from a frozen meal or an oven-heated food product.
Step 1: Confirm the Application Requirements
Before testing the tray, define the actual application.
This sounds simple, but it is one of the most important steps.
The manufacturer should collect information about:
Food Product
Food type
Filling weight
Food moisture
Oil content
Sauce content
Product dimensions
Storage
Ambient
Refrigerated
Frozen
Heating
No heating
Microwave
Oven
Other heating method
Packaging Process
Heat sealing
MAP
VSP
Manual sealing
Automatic sealing
Commercial Requirements
Target shelf life
Estimated annual volume
Tray dimensions
Required MOQ
Packaging line speed
Without this information, it is difficult to select the correct bagasse tray structure.
Step 2: Check the Tray Dimensions
Before testing sealing performance, compare the new bagasse tray with the customer's existing package.
Important measurements include:
Length
Width
Height
Bottom dimensions
Rim width
Tray depth
Corner radius
Compartment dimensions
Stacking height
If the bagasse tray is replacing an existing PP, PET, or CPET tray, the existing tray can be used as a reference.
A custom mold can then be developed around the required dimensions.
For projects that need minimal changes to the packaging line, a 1:1 replacement design may be considered.
Step 3: Inspect the Sealing Rim
The sealing rim is one of the most important areas of a heat-sealable tray.
Before running the machine, check whether the rim is:
Flat
Clean
Stable
Continuous
Wide enough for the intended sealing system
The sealing surface should not have unnecessary deformation or contamination.
A small defect on the rim can become a major problem when the package is produced thousands of times per day.
Step 4: Select the Correct Lidding Film
The tray and lidding film must be compatible.
Do not assume that a lidding film used with a plastic tray will automatically work with a bagasse tray.
Check:
Film material
Sealing layer
Film thickness
Sealing temperature
Seal strength
Peel behavior
Barrier requirements
Application temperature
For certain applications, the lidding film may also need to support:
MAP
VSP
High oxygen barrier
Freezer storage
Microwave heating
Oven heating
The lidding film should therefore be tested together with the final tray structure.
Step 5: Run an Initial Heat-Sealing Test
The first sealing test should establish a workable processing window.
Three key parameters are:
Sealing Temperature
The sealing layer needs sufficient heat to create a bond.
Too little heat may produce a weak seal.
Too much heat may damage the film or affect the tray.
Sealing Pressure
Pressure helps bring the sealing surfaces together.
Insufficient pressure can create inconsistent contact.
Excessive pressure may deform the tray or damage the sealing area.
Dwell Time
Dwell time determines how long heat and pressure are applied.
Too little time may result in incomplete sealing.
Too much time may reduce production efficiency or create excessive thermal exposure.
The exact values depend on the tray, film, lidding film, and sealing equipment.
They should be established through actual testing rather than copied from another packaging project.
Step 6: Check Seal Strength
A successful package should have a stable and repeatable seal.
Seal strength testing can help determine whether the tray and lidding film are bonding properly.
Look for:
Continuous sealing
Consistent bonding
No open areas
No channels
No obvious film separation
Controlled peel behavior
The desired seal strength depends on the application.
A package that needs easy opening may require a different seal design from a package where maximum seal integrity is the priority.
Step 7: Perform a Leak Test
Leak testing is especially important for:
Ready meals
Soups
Sauced foods
Meat products
Seafood
Liquid-containing meals
A tray may appear perfectly sealed while still having a small leak.
Testing should therefore include the finished package.
Depending on the package and application, testing may be performed after:
Sealing
Handling
Freezing
Refrigeration
Heating
Transportation simulation
The test method should match the actual packaging risk.
Step 8: Test the Tray With the Real Food
One of the biggest mistakes in packaging development is testing only an empty tray.
Food changes the packaging environment.
For example, oil, sauce, moisture, salt, acidity, and food particles can affect the sealing area.
Therefore, after the initial empty-tray test, use the actual food product whenever possible.
Check:
Filling accuracy
Food contamination on the rim
Seal quality
Leakage
Tray deformation
Product presentation
Handling
If the food reaches the sealing area, even a technically suitable tray may produce inconsistent results.
Step 9: Test MAP Performance if Required
If the tray will be used for Modified Atmosphere Packaging, additional testing is required.
A typical MAP package needs to control:
Gas composition
Oxygen level
Seal integrity
Gas retention
Barrier performance
For higher oxygen-barrier requirements, an EVOH-enhanced structure may be considered.
The final package should be tested under the intended storage conditions.
Important measurements may include:
Initial gas composition
Oxygen level
Carbon dioxide level
Changes during storage
Package integrity
MAP performance should be evaluated with the actual food product rather than a generic test product.
Step 10: Test VSP Applications if Required
For Vacuum Skin Packaging, the package needs to be evaluated under vacuum conditions.
Check:
Tray rigidity
Film behavior
Product position
Rim integrity
Sealing performance
Film contact
Package appearance
The tray geometry can have a significant impact on the final VSP package.
A tray that performs well under standard heat sealing may require additional optimization for VSP.
Step 11: Test Freezer Performance
If the package will be frozen, do not stop testing after sealing.
The package should go through the actual temperature cycle.
For example:
Sealing → Freezing → Storage → Handling → Thawing/Reheating
Check for:
Cracks
Delamination
Tray deformation
Film separation
Seal failure
Leakage
Low-temperature performance depends on the complete tray and film structure.
The exact test temperature should be based on the customer's actual storage conditions.
Step 12: Test Microwave Performance
For microwaveable ready meals, test the finished package under the intended heating conditions.
Important factors include:
Microwave power
Heating time
Food composition
Oil content
Water content
Tray structure
Film structure
Lidding system
The test should represent the real consumer heating instructions as closely as possible.
After heating, check:
Tray deformation
Seal performance
Leakage
Food contact area
Package handling
Product presentation
Do not label a package “microwave safe” simply because the base material can tolerate heat.
The complete packaging system needs to be evaluated.
Step 13: Test Oven Performance
Oven applications require particular attention to temperature.
A high-temperature food tray may need a different film structure from a chilled or frozen tray.
Testing should consider:
Oven temperature
Heating time
Food weight
Food moisture
Oil content
Tray geometry
Film structure
After heating, inspect the tray and sealing system.
Check for:
Deformation
Film failure
Leakage
Seal problems
Loss of structural stability
The manufacturer's stated temperature range should not replace application-specific testing.
Step 14: Check Stacking and Transportation
A tray may perform well on the sealing machine but fail during distribution.
This is particularly important for:
Ready meals
Supermarket products
Meal delivery
Foodservice distribution
Frozen food
Fresh food
Transportation testing can include:
Stacking
Compression
Vibration
Handling
Drop or impact testing where appropriate
The objective is to make sure the package remains intact after leaving the production line.
Step 15: Check Shelf-Life Requirements
For food manufacturers, the final question is often not:
“Can we seal the tray?”
It is:
“Can the package protect our food for the required shelf life?”
Shelf-life performance depends on many factors:
Food formulation
Initial microbial load
Storage temperature
Gas atmosphere
Oxygen transmission
Moisture transmission
Seal integrity
Lidding film
Tray structure
Therefore, packaging testing should be combined with product-specific shelf-life validation.
The packaging supplier can provide material and packaging data, but the final shelf-life assessment should be based on the complete food system.
Common Heat-Sealing Problems and Their Causes
Problem 1: Weak Seal
Possible causes include:
Sealing temperature too low
Insufficient pressure
Insufficient dwell time
Incompatible film
Contaminated sealing area
Problem 2: Film Does Not Seal Evenly
Possible causes include:
Uneven tray rim
Incorrect tooling
Tray deformation
Film tension
Inconsistent pressure
Problem 3: Tray Deforms During Sealing
Possible causes include:
Excessive temperature
Excessive pressure
Incorrect dwell time
Inappropriate tray structure
Film selection
Problem 4: Leaking After Filling
Possible causes include:
Incomplete seal
Food contamination on the rim
Tray cracks
Film damage
Incorrect sealing conditions
Problem 5: Good Manual Test but Poor Automatic Production
Possible causes include:
Machine speed
Tooling differences
Uneven pressure
Film feeding
Tray positioning
Production-line temperature variation
This is why production-line trials are so important.
How Many Samples Should Be Tested?
There is no universal sample number for every food packaging project.
The required quantity depends on:
Packaging line
Production speed
Food product
Risk level
Testing program
Shelf-life requirements
A few successful samples can confirm that the basic concept works.
But they do not automatically prove production consistency.
For commercial projects, testing should include enough samples to evaluate repeatability under realistic production conditions.
Should You Test the Existing Plastic Tray at the Same Time?
Yes, this can be useful.
If you are replacing a PP, PET, or CPET tray, keep samples of the existing package as a reference.
Compare the two packages under the same conditions.
For example:
| Test | Existing Plastic Tray | New Bagasse Tray |
|---|---|---|
| Dimensions | ✓ | ✓ |
| Filling | ✓ | ✓ |
| Heat sealing | ✓ | ✓ |
| Leak test | ✓ | ✓ |
| Freezer test | ✓ | ✓ |
| Microwave test | ✓ | ✓ |
| Oven test | ✓ | ✓ |
| MAP test | ✓ | ✓ |
| VSP test | ✓ | ✓ |
| Transportation | ✓ | ✓ |
The objective is not necessarily to make every property identical.
Instead, the goal is to determine whether the new packaging meets the actual requirements of the application.
What Information Should You Send a Bagasse Tray Manufacturer?
If you want a manufacturer to develop a heat-sealable bagasse tray, providing detailed information at the beginning can significantly improve the development process.
Useful information includes:
Existing Packaging
Technical drawing
CAD file
Tray dimensions
Photos
Food
Food type
Filling weight
Oil content
Sauce content
Product characteristics
Temperature
Chilled
Frozen
Microwave
Oven
Reheating
Packaging Process
Heat sealing
MAP
VSP
Manual
Semi-automatic
Fully automatic
Film
Current lidding film
Required barrier
Desired opening behavior
Commercial Information
Estimated order quantity
Target launch date
Required MOQ
Packaging market
Certification requirements
With this information, the supplier can recommend a more suitable tray and film structure.
A Practical Pre-Production Testing Workflow
For a new project, the process can be organized into several stages.
Stage 1 — Requirement Review
Confirm the food, temperature, packaging process, tray dimensions, and commercial requirements.
Stage 2 — Structure Selection
Select the bagasse tray structure and functional film according to the application.
Stage 3 — Mold Development
Develop a custom mold based on the customer's drawing, sample, or product requirements.
Stage 4 — Sample Production
Produce prototype or production-intent samples.
Stage 5 — Sealing Test
Test tray + lidding film + sealing equipment.
Stage 6 — Food Test
Run the tray with the actual food product.
Stage 7 — Storage and Performance Test
Evaluate the package under actual temperature and storage conditions.
Stage 8 — Production Trial
Run the tray on the intended commercial packaging line.
Stage 9 — Final Approval
Confirm the final dimensions, material structure, film, tooling, packaging process, and quality requirements.
Stage 10 — Mass Production
Move to commercial production after the packaging system has been validated.
This staged approach can reduce the risk of discovering compatibility problems after a large production order has already been placed.
How Hebei Mountain Supports Testing Before Mass Production
Hebei Mountain focuses on molded bagasse food packaging with functional film structures for commercial applications.
For customers switching from plastic trays, the development process can start with an existing tray or packaging requirement.
We can support:
Custom tray development
Heat-sealable bagasse trays
Film structure selection
Custom molds
1:1 replacement projects
Lidding film matching
MAP applications
VSP applications
Packaging equipment solutions
Sample development
Our in-house mold capabilities include more than 3,000 existing molds, with support for new custom molds.
For a new project, customers can provide their existing tray, drawing, food application, temperature requirements, and packaging machine information.
The packaging can then be developed around the actual application rather than selecting a standard tray from a catalog.
Final Checklist Before Mass Production
Before approving a new heat-sealable bagasse tray, make sure you have checked:
Tray dimensions
Tray rigidity
Sealing rim
Film structure
Lidding film compatibility
Sealing temperature
Sealing pressure
Dwell time
Seal strength
Leak resistance
Actual food compatibility
Freezer performance if required
Microwave performance if required
Oven performance if required
MAP performance if required
VSP performance if required
Transportation performance
Shelf-life requirements
Production-line compatibility
Final mold approval
Only after these areas have been evaluated should the project move into full-scale production.
Final Thoughts
A heat-sealable bagasse tray should not be judged only by how it looks.
For commercial food packaging, the real test is whether the complete package works under the conditions it will face after production.
That means testing:
Tray + film + lidding film + sealing machine + food + temperature + storage + transportation
For food manufacturers replacing PP, PET, or CPET trays, a structured testing process can help identify technical problems before mass production.
It also gives both the buyer and manufacturer a clearer basis for approving the final packaging structure.
If you are considering a switch to heat-sealable bagasse packaging, send us your existing tray sample or drawing together with your food application, temperature requirements, lidding film, and packaging machine information. We can use these details to develop a suitable bagasse tray sample for testing before mass production.
Frequently Asked Questions
How do you test a heat-sealable bagasse tray?
Start by checking the tray dimensions and sealing rim, then test the tray with the intended lidding film and sealing machine. After that, evaluate seal strength, leakage, food compatibility, temperature performance, storage, transportation, and any MAP or VSP requirements.
What is the most important test for a heat-sealable bagasse tray?
There is no single test that covers every application. Seal integrity, leak resistance, food compatibility, temperature performance, and production-line compatibility are all important.
Can I test the bagasse tray using my existing sealing machine?
In many projects, yes. Existing equipment can be used for compatibility trials, provided the tray dimensions and tooling can be accommodated.
Can the same lidding film used for a PP or PET tray be used with bagasse?
It may be possible, but it must be tested. The sealing layer on the bagasse tray needs to be compatible with the lidding film.
How do I test a bagasse tray for MAP?
Test the complete package with the actual food product and intended gas mixture. Evaluate seal integrity, gas retention, oxygen level, barrier performance, and storage behavior.
How do I test a bagasse tray for frozen food?
Seal the tray with the intended film, freeze it under the actual storage conditions, and then evaluate the tray, film, seal, and package after freezing and handling.
How do I test a bagasse tray for microwave use?
Use the actual food product and intended microwave power and heating time. Check the tray, film, seal, leakage, and structural performance after heating.
Can an existing plastic tray be used to develop a bagasse replacement?
Yes. Existing PP, PET, or CPET trays can be used as references for custom mold development. Drawings and CAD files can also be used.
Should I order a large quantity before testing?
For a new packaging structure, it is generally useful to validate samples and production-intent packaging before committing to a large commercial order.